Believe it or not, there will come a time to winterize and place your snow blower in storage for the season. And while it may be easy – and perhaps provide a sense of relief – to just push it to the back of the garage, there are a handful of tasks to carry out to store your equipment properly. Neglecting these snow blower winterizing tasks can cause starting or operating issues next winter.
Keep in mind that some snow blower storage requirements and instructions differ between single-stage and two-stage units, but this helpful guide and the accompanying video will walk you through the necessary steps to store your snow blower correctly.
How to Store Snow Blower Regardless of Unit Type:
Step 1: Begin by reading the “Off-Season Storage” section of your owner’s manual before beginning any snow blower maintenance for winter storage.
Step 2: Next, check the unit’s maintenance items to see if they need to be replaced. These items can be found in your owner’s manual in the “Maintenance and Adjustments” section and the “Service” section. Grab a piece of paper to create a list of replacement parts you might need.
Step 3: Before cleaning, repairing or inspecting your snow blower, disengage all control levers and stop the engine. Wait until the auger/impeller comes to a complete stop. Disconnect the spark plug ignition wire and ground it against the engine to prevent unintended starting. Never crank the engine with the spark plug removed.
How to Winterize Two-Stage Snow Blower Units:
Step 3: Check the snow blower shave plate and skid shoes for wear. The shave plate and skid shoes are installed to protect the housing from damage, so don’t wait until the wear is so severe that the housing is no longer protected; this could lead to a major repair.
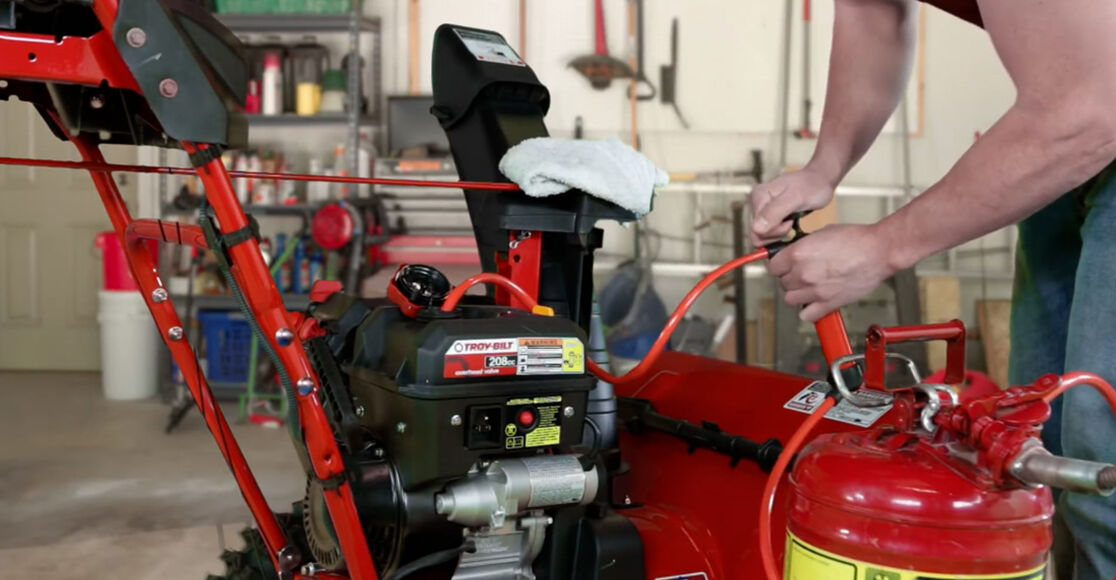
Step 4: Drain any fuel left in the tank by using a siphon pump. To drain gas from a snow blower, with the help of an additional person, carefully pivot the snow blower up and forward so it rests on the auger housing.
Step 5: Remove the lower frame cover from the underside of the unit. Check the gear shaft and apply a light coating of oil to the hex shaft. Be careful not to get any oil on the aluminum drive plate or the rubber friction disc, and check the rubber friction disc for wear or cracking.
Step 6: Put the lower frame cover back in place. With the help of an additional person, carefully pivot the snow blower back and down so it rests on the wheels and skid shoes.
Step 7: Remove the belt cover on the front of the engine and inspect the belt(s) for wear, cracks and fraying. If your belts are worn, then you know it is time for a snow blower belt replacement. Worn belts can break at very inconvenient times, so make sure you replace your belt as soon as you see signs of wear. After replacing, put the plastic belt cover back in place.
How to Winterize Single-Stage Snow Blower Units:
Step 3: Carefully tilt the snow blower back so it rests on the handle.
Step 4: Check the shave plate for wear. Many shave plates have two wearing edges and can be reversed if needed.
Step 5: Check the auger’s rubber paddles for damage and wear. They should be replaced if any excessive wear is present. Never allow the rubber paddles to wear to the point that the metal portion of the auger itself can come in contact with the pavement.
Step 6: Remove the belt cover on the side of the snow blower. Check the belt for wear, cracks, fraying, etc.
Step 7: If any of the items previously mentioned need to be replaced, then order them immediately so you’re equipped to repair the parts prior to next season.
How to Store Snow Blower Regardless of Unit Type:
Step 8: If your unit has a 4-cycle engine, the next step is to change the snow blower engine’s oil. Be sure to dispose of the drained oil in an environmentally friendly manner. To drain the oil from your snow blower, use a plastic drain sleeve (which may have come with your unit), or a siphon pump, which can be purchased where snow blower parts are sold.
Step 9: Next, remove the spark plug.
Step 10: Inspect the spark plug before reinstalling it. Clean it with a wire brush if necessary. If you are unsure whether the spark plug is good or not, then it is recommended to replace it. Reinstall the spark plug and reconnect the spark plug ignition wire.
Step 11: Clean debris from around the engine and muffler. Apply a light film of oil on any areas that are susceptible to rust. Wipe away any dried salt that may accumulate over winter to help prevent rusting.
Step 12: Finally, it’s recommended that you store your snow blower with a full tank of fresh, stabilized fuel. Old fuel left in the fuel system can lead to serious engine problems next winter. A fuel stabilizer for snow blowers should be added to the gas before filling your tank. The stabilizer creates a barrier between the gas and the atmosphere to prevent oxidation, moisture contamination and fuel separation. You’ll want to run your engine for three to five minutes to get the fresh fuel with stabilizer into your carburetor. Then, top off your fuel tank again after running the engine. This is also better than winterizing your snow blower on empty, as an empty fuel system exposes bare metal parts within it to air and moisture and can lead to rust. It can also dry out, crack and shrink gaskets and O-rings, causing eventual equipment problems. Be sure to keep the snow blower engine level while in storage and avoid tilting, as this can cause a fuel or oil leak. If you plan to cover the snow blower, make sure air can get under the cover.
These simple steps can keep your equipment ready and reliable for the next snow season.